Windows Live Mail is an email client for Windows 7 or 8. You can download it for free from the Microsoft website.
Windows Live Mail needs its own app password to access your information. If you use your normal password or your Fastmail two step verification password on an external account, syncing to an external service won't work and you will see a password error.
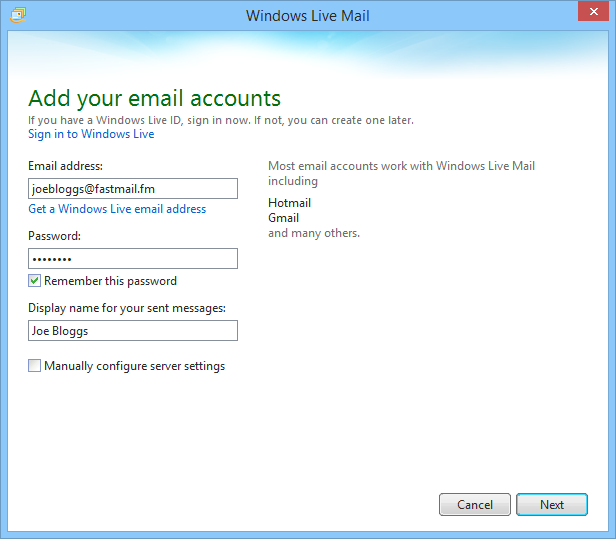
- Open Windows Live Mail. The "Add your email accounts" dialog will appear. If it does not, click the File button in the top left of the window, then Options → Email accounts… to open the Accounts window. Click the Add… button.
- Fill in your name and email address:
- Email Address: The email address you wish to use for sending mail (this is normally your Fastmail username, but can be another address at your own domain).
- Password: Your Windows Live app password. (What is an app password?)
- Display name for your sent messages: The name people will see on the email you send. The screen should look similar to the image below:

- Click Next. Fill in the Incoming server information:
- Server type: IMAP
- Server address:
imap.fastmail.com - Port:
993 - Require a secure connection (SSL): Yes
- Authenticate using: Clear text
- Logon user name: Your full Fastmail username, including the domain. Fill in the Outgoing server information:
- Server address:
smtp.fastmail.com - Port:
465 - Require a secure connection (SSL): Yes
- Require authentication: Yes It should look as in the screenshot below (but with your username instead):

- Click Next, then Finish.